Macro Photography Journey - DIY Diffuser
One of the biggest challenges in macro photography is light! That statement sounds easy to fix by simply using a speedlight (flash), but the real challenge is how to soften the light!
If you are photographing a shiny beetle or a spider’s eyes with a speedlight straight out the box you will get a bright reflection/spot bouncing off the shiny part of your subject - this is called specular highlights. The only way to reduce this is to soften the light resulting in a more evenly distributed spread of light and this is achieved by DIFFUSING the light.
Refer the 2 images below, the top one was with no diffuser (notice the bright spot in the eyes) and the bottom one was with the home-made diffuser I am going to show you how to make (don’t stress, it is simple!)


Let’s begin…
Required items
A4 size piece of translucent plastic (ensure it is colourless).
A4 size piece of diffusing material (tracing or wax paper works well - I used a piece of an old see-through reflector I had lying around).
Scissors.
Ruler.
Pen.
Rubber band.
Glue.

Diffuser shape
We are going to be working on the A4 piece of plastic:
Cut the longest (ie width) end so it measures 24cm wide.
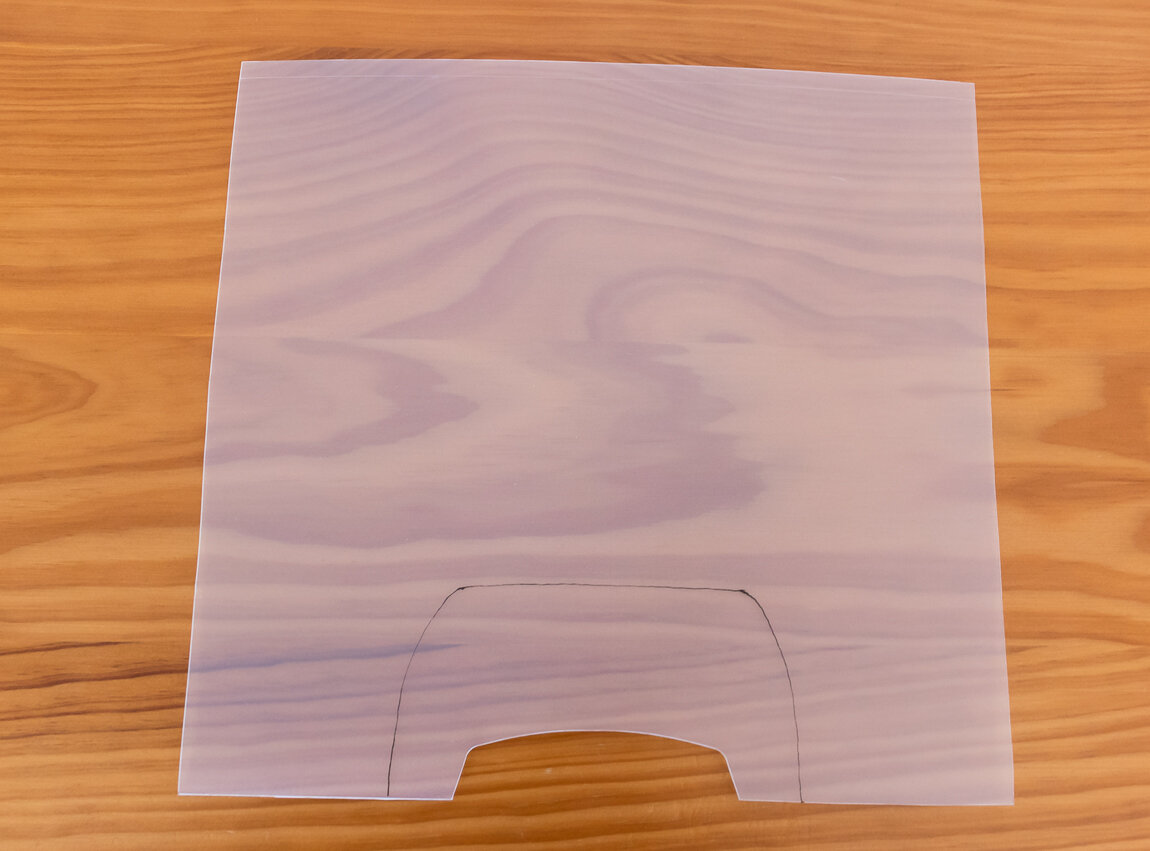
Then draw a semi-circle (refer 1st image below) 13cm wide by 6cm high - this is the part that will wrap around your lens barrel.
Round off the 2 top corners.
Once complete your piece of plastic should look like 2nd image below.

Diffusing material
Simply repeat the process above but this time on the diffusing material of your choice (it should resemble image below which is a carbon copy of the piece of plastic).

Joining the diffusing material to the plastic
Time now to simply glue the diffusing material to the plastic - I found that a small amount of super glue along the edge of the plastic was sufficient to attach the material (and it’s quick drying).
finishing touches
Once the glue has set, there are a few finishing touches that you will need to make:
Firstly make a small hole in bottom left and right corner where the semi circle meets the bottom of the plastic (these are the holes where the rubber band goes through).
Feed the rubber band through one hole and tie knot so it does not slip through.
Take the bottom corners and twist them so they meet - you should end up with a dome shape.
Holding in place, feed the rubber band through the open hole and secure with knot.
At this stage your diffuser should look like the one attached to my Canon MP-E65 lens below (notice I use a strip of lenscoat to prevent any scratches to my lens barrel).

I would suggest that you test your plastic and diffusing material to see if you get the desired results BEFORE you start building it - will save time and money! Notice that I still use a mini softbox on my speedlight, this is because it has reflective material inside that bounces the light down onto my diffuser.
Feel free to leave a comment or use the “contact” button on my website if you need any help on any of the steps.
Till next time…